Guide to the Overmap: Difference between revisions
m (adds guides category) |
Sadhorizon (talk | contribs) (→Ship Info: Linked the prefix page.) |
||
| (24 intermediate revisions by 10 users not shown) | |||
| Line 1: | Line 1: | ||
[[File:Overmap.png|thumb|354x354px|A view of Shiptest's | {{FrameBox|title=WARNING|content=Leaving your ship while it is undocked in space is dangerous! Walking out of your ship into hyperspace will deal incredible brute damage, likely killing you. Space hazards such as electrical storms and asteroid fields are highly dangerous to your whole ship and should be avoided at all cost. Be aware of whether you have enough fuel to stop!|color=F00|image=Shockwarning.png}}[[File:Overmap.png|thumb|354x354px|A view of Shiptest's Overmap, from a ghost's eye view.]] | ||
The Overmap is a representation of local space, featuring ships, hazards, and points of interest. This page aims to provide a quick reference to navigating, as well as any hazards and their effects so you can avoid or prepare for them. | The Overmap is a representation of local space, featuring ships, hazards, and points of interest. This page aims to provide a quick reference to navigating, as well as any hazards and their effects so you can avoid or prepare for them. | ||
==Objects== | ==Objects== | ||
{| class="wikitable" | {| class="wikitable sortable" | ||
|+Overmap Objects | |+Overmap Objects | ||
!Name | !Name | ||
!Type | !Type | ||
!Description | ! class="unsortable" | Description | ||
!Icon | ! class="unsortable" style='background:#232429; color:#FFFFFF;'| Icon | ||
|- | |- | ||
|Asteroid Field | |Asteroid Field | ||
|Hazard | |Hazard | ||
|Causes explosion-causing impacts to random parts of your ship | |Causes explosion-causing impacts to random parts of your ship. | ||
|[[File:Asteroidstorm.png|frameless]] | |style='background:#0D0E1F;'|[[File:Asteroidstorm.png|frameless]] | ||
|- | |- | ||
|Electrical Storm | |Electrical Storm | ||
|Hazard | |Hazard | ||
|Causes tesla-like shocks to random parts of your ship | |Causes tesla-like shocks to random parts of your ship. | ||
|[[File:Electricalstorm.png|frameless|32x32px]] | |style='background:#0D0E1F;'|[[File:Electricalstorm.png|frameless|32x32px]] | ||
|- | |- | ||
|Ion Storm | |Ion Storm | ||
|Hazard | |Hazard | ||
|EMPs random parts of your ship | |EMPs random parts of your ship. '''Currently disabled'''. | ||
|[[File:Ionstorm.png|frameless]] | |style='background:#0D0E1F;'|[[File:Ionstorm.png|frameless]] | ||
|- | |- | ||
|Nebula | |Nebula | ||
|Neutral | |Neutral | ||
|Blocks sensor vision. | |Blocks sensor vision. | ||
|[[File:Nebula.png|frameless]] | |style='background:#0D0E1F;'|[[File:Nebula.png|frameless]] | ||
|- | |- | ||
| | |Outpost | ||
|Point of Interest | |||
|Buy useful items and accept missions here. | |||
|style='background:#0D0E1F;'|[[File:Outpost.gif|frameless]] | |||
|- | |||
|Asteroid Field | |||
|Point of Interest | |Point of Interest | ||
|Landable and resource-rich. Inhabited by dangerous fauna. | |Landable and resource-rich. Inhabited by dangerous fauna. | ||
|[[File:Largeasteroid.png|frameless]] | |style='background:#0D0E1F;'|[[File:Largeasteroid.png|frameless]] | ||
|- | |- | ||
|Energy Signatures | |Energy Signatures | ||
|Point of Interest | |Point of Interest | ||
|Anomalous signal originating from a structure in space. | |Anomalous signal originating from a structure in space. | ||
|[[File:Energysignature.png|frameless]] | |style='background:#0D0E1F;'|[[File:Energysignature.png|frameless]] | ||
|- | |- | ||
|Planetoids | |Planetoids | ||
|Point of Interest | |Point of Interest | ||
|Small, landable planets. Landscape and vegetation varies on type; see further below. | |Small, landable planets. Landscape and vegetation varies on type; see further below. | ||
|[[File: | |style='background:#0D0E1F;'|[[File:Planetoids.gif|frameless]] | ||
|- | |- | ||
|Wormholes | |Wormholes | ||
|Special | | Special | ||
|Two-way hole in space-time, taking you from point A to point B. Can collapse violently, damaging ships. | |Two-way hole in space-time, taking you from point A to point B. Can collapse violently, damaging ships. | ||
|[[File:Wormhole.png|frameless]] | |style='background:#0D0E1F;'|[[File:Wormhole.png|frameless]] | ||
|- | |- | ||
|Stars | |Stars | ||
|Hazard | |Hazard | ||
|It's a giant ball of plasma (state of matter). Don't get close to it. | |It's a giant ball of plasma (state of matter). Don't get close to it. | ||
|[[File:Star small.png|frameless]] | |style='background:#0D0E1F;'|[[File:Star small.png|frameless]] | ||
|- | |||
|Anomaly Fields | |||
|Hazard | |||
|Causes anomalies to appear on your ship. | |||
|style='background:#0D0E1F;'|[[File:Anomalyfield.png|frameless]] | |||
|- | |||
|Dust Storms | |||
|Hazard | |||
|Causes your ship to impact with space dust. At high speeds, can deal minor damage. | |||
|style='background:#0D0E1F;'|[[File:Duststorm.png|frameless]] | |||
|- | |||
|Carp Migrations | |||
|Hazard | |||
|Makes space carps appear around your ship. | |||
|style='background:#0D0E1F;'|[[File:Carpmigration.png|frameless]] | |||
|} | |} | ||
==Piloting== | ==Piloting== | ||
[[File:Helm | [[File:Helm Overview.png|thumb|The ship helm console UI (As of January 2024)]] | ||
This guide will break down the parts of the helm console display by section, and provide a step-by-step guide at the very end on how to fly like a pro. | This guide will break down the parts of the helm console display by section, and provide a step-by-step guide at the very end on how to fly like a pro. | ||
===Panel Info=== | === Panel Info=== | ||
====Navigation==== | ====Navigation==== | ||
[[File:Helm | [[File:Helm Navigation 2023.png]] | ||
The bread and butter of flying, this panel accepts commands on which direction to burn the engines in. Pressing the middle circular button will cause the engines to fire in reverse, slowing and/or stopping the vessel. | The bread and butter of flying, this panel accepts commands on which direction to burn the engines in. Pressing the middle circular button will cause the engines to fire in reverse, slowing and/or stopping the vessel. | ||
When inputting commands, remember that your '''control direction is more nuanced than your travel direction.''' What that means is that you could be traveling 4spM east, and only have to press south once in order to adjust your bearing to southeast, upon which you will travel perfectly diagonally. From there, you only have to press up once to reset your heading to east. Keep this in mind to conserve fuel as you don't need to adjust too much to get the proper heading. '''Going diagonally means your ship will travel between two cardinal tiles unaffected!''' Use this to slip between asteroid fields and other hazards without making a major course change. | When inputting commands, remember that your '''control direction is more nuanced than your travel direction.''' What that means is that you could be traveling 4spM east, and only have to press south once in order to adjust your bearing to southeast, upon which you will travel perfectly diagonally. From there, you only have to press up once to reset your heading to east. Keep this in mind to conserve fuel as you don't need to adjust too much to get the proper heading. '''Going diagonally means your ship will travel between two cardinal tiles unaffected!''' Use this to slip between asteroid fields and other hazards without making a major course change. | ||
The four buttons on the top right (from left to right) are the undock button, the dock in space button, the bluespace jump button, and the AI control button. Docking and undocking are covered in the next section. Bluespace jumping removes your ship (along with everything on it, like people and items) from the round, easing the burden on the server. The AI control button is off by default. When it is on, it turns green. Turning it on lets AIs control the ship. | |||
=====Docking===== | =====Docking===== | ||
Assuming you read the last section, you know where the undocking and docking in space buttons are. The undocking button's purpose is simple; it undocks you from wherever you are and lets you move again. The docking in space button will dock you in '''empty space'''. To dock to points of interest, see [[#Radar|the radar]]. | |||
====Velocity==== | ====Velocity==== | ||
[[File:Helm velocity.png]] | [[File:Helm velocity.png]] | ||
| Line 75: | Line 99: | ||
This panel shows the name and fuel level of all the detected engines on the ship. Keep in mind that there is no optimal efficient speed: Your fuel efficiency will be the same no matter what. However, lower speeds are much more forgiving for adjustments fuel-wise. Additionally, You can click the engine’s names to toggle them to strategically save fuel. Your ship will not slow down from drag in empty space, so a high speed can be maintained with little fuel if you're smart about how you use it. '''If your thrusters are out of fuel, you will suffer passive slowdown to increase your chances of survival!''' | This panel shows the name and fuel level of all the detected engines on the ship. Keep in mind that there is no optimal efficient speed: Your fuel efficiency will be the same no matter what. However, lower speeds are much more forgiving for adjustments fuel-wise. Additionally, You can click the engine’s names to toggle them to strategically save fuel. Your ship will not slow down from drag in empty space, so a high speed can be maintained with little fuel if you're smart about how you use it. '''If your thrusters are out of fuel, you will suffer passive slowdown to increase your chances of survival!''' | ||
====Ship Info==== | ====Ship Info==== | ||
[[File:Helm | [[File:Helm Info 2023.png]] | ||
This panel shows the name, class, sensor range, and mass of your vessel. Click the ship name to rename it. '''See also''', [[Ship Prefixes]]. | |||
====Radar==== | ====Radar==== | ||
[[File:Helm radar.png]] | [[File:Helm radar.png]] | ||
This panel shows all of the objects in docking range of your ship. Hit the button in the “Act” column to interact with an object. | This panel shows all of the objects in docking range of your ship. Hit the button in the “Act” column to interact with an object. As of November 2021, you are now able to dock in empty space tiles. Make use of this for spot repairs, ship modification, and other endeavors you need to dock for, but can't find a planet in order to do so. | ||
===Piloting Guide=== | ===Piloting Guide=== | ||
#[[#Docking|Ensure your ship is undocked.]] | #[[#Docking|Ensure your ship is undocked.]] | ||
#[[#Engines|Ensure at least one engine is on and fueled.]] | #[[#Engines|Ensure at least one engine is on and fueled.]] | ||
#[[#Navigation|Press the navigational button in the direction you want to fly.]] | #[[#Navigation|Press the navigational button in the direction you want to fly.]] | ||
# | #Press the navigational button again to cease accelerating | ||
#When you | # When you get near the destination, press the center button. One press stops any current acceleration, two presses starts braking. | ||
#If you want to dock with the object, go down to the [[#Radar|radar tab]] and hit the “act” button next to the desired docking object. | #If you want to dock with the object, go down to the [[#Radar|radar tab]] and hit the “act” button next to the desired docking object. | ||
#You have reached your destination, and are ready to fly anywhere in the solar system! | #You have reached your destination, and are ready to fly anywhere in the solar system! | ||
== Advanced Piloting == | |||
==Advanced Piloting== | |||
You've learned the basics. Now it's time for a few tricks to help you stay ahead of the competition. | You've learned the basics. Now it's time for a few tricks to help you stay ahead of the competition. | ||
=== Advanced Overmap Techniques === | === Advanced Overmap Techniques=== | ||
The overmap isn't always all it seems. Here's how you can make the best of its little discrepancies (and hidden features!) | The overmap isn't always all it seems. Here's how you can make the best of its little discrepancies (and hidden features!) | ||
* If a ship is hiding itself somehow, as interceptors or pirates are known to, you can locate it easily by right-clicking the tiles on the overmap and looking at the object list. Even if there's no ship sprite on the tile, it's name will pop up in the list. Take that, sneaky bastards! | *If a ship is hiding itself somehow, as interceptors or pirates are known to, you can locate it easily by right-clicking the tiles on the overmap and looking at the object list. Even if there's no ship sprite on the tile, it's name will pop up in the list. Take that, sneaky bastards! | ||
* The edge of the overmap loops back around in both X and Y. Use it to travel faster, escape from enemy sensors for a moment and hide, or sneak up on someone unsuspecting. Keep in mind it's dangerous to travel quickly across it, as you won't see what's there until you've looped around! | * The edge of the overmap loops back around in both X and Y. Use it to travel faster, escape from enemy sensors for a moment and hide, or sneak up on someone unsuspecting. Keep in mind it's dangerous to travel quickly across it, as you won't see what's there until you've looped around! | ||
* If you want to be strategic, make an X and Y list of all the planets you come across so you can know where to hide later. It might just come in handy | *If you want to be strategic, make an X and Y list of all the planets you come across so you can know where to hide later. It might just come in handy. | ||
===Ace Pilot Best Practices=== | |||
=== Ace Pilot Best Practices === | An assortment of other tips that will aid your journey. ''Did you know... there are three kinds of aces? Those who seek strength. Those who live for pride. And those who can read the tide of battle.'' | ||
An assortment of other tips that will aid your journey. ''Did you know... there are three kinds of aces? Those who seek strength. Those who live for pride. And those who can read the tide of battle.'' | *As long as you're undocked in space, walking into the area outside your ship (hyperspace) will deal incredible brute damage to you, likely killing you. Avoid doing so at any opportunity, or use it to delete items quickly and threaten prisoners. | ||
* As long as you're undocked in space, | *Never leave the helm when the ship is in motion, unless you want your ship to explode and your crew to die horribly. | ||
* Setting up your backup generators ahead of time is greatly recommended. Running out of power at the wrong time means you'll likely get shredded by asteroids or worse, especially if you're traveling fast | *Setting up your backup generators ahead of time is greatly recommended. Running out of power at the wrong time means you'll likely get shredded by asteroids or worse, especially if you're traveling fast | ||
* Renaming your ship is fun and adds a level of personal touch. | *Renaming your ship is fun and adds a level of personal touch. | ||
* '''Never undock without all of your crew accounted for!''' Due to loading bugs, it can sometimes be impossible to recover crewmates stuck on a planet without admin help. '''Always issue a warning well before you undock!''' | *'''Never undock without all of your crew accounted for!''' Due to loading bugs, it can sometimes be impossible to recover crewmates stuck on a planet without admin help. '''Always issue a warning well before you undock!''' | ||
* Chasing down other ships is a matter of matching your speed and constantly gauging the area in your scanners. Check the overmap: Where will they run to? Where might they hide? Be a step ahead, always. | *Chasing down other ships is a matter of matching your speed and constantly gauging the area in your scanners. Check the overmap: Where will they run to? Where might they hide? Be a step ahead, always. | ||
* Keep your wideband open, just in case. People tend to use it for emergency distress signals <s>or idiotic small talk</s>. This is important if you're a rescue ship! | *Keep your wideband open, just in case. People tend to use it for emergency distress signals <s>or idiotic small talk</s>. This is important if you're a rescue ship! | ||
== So Your Ship Is Falling Apart... == | ==So Your Ship Is Falling Apart...== | ||
Uh oh! Did <s>you</s> your pilot fly the ship into an asteroid storm and now you're stuck trying to fix up your ship? Here's what you can do to stay alive! | |||
''' | *Stop the ship. This is your priority. Stopping the ship means you won't fly into more hazards! Ideally, you still have a powered helm and a fueled thruster. | ||
**If you have no power wherever your helm console is, you can move it somewhere else with tools. | |||
**Try to always have some fuel on hand, never spend it all. This helps in emergencies. | |||
**If your helm console or it's circuit are gone, It's pretty much hopeless. Get in a central area and '''pray''' for rescue. | |||
*Dock in space and repair your ship as best you can. | |||
*Land at a beach or jungle planet to repressurize your ship. These planets have an Earth-like atmosphere. | |||
==Related Media: The Emergency Safe== | |||
https://www.youtube.com/watch?v=vPwW7RaPO_g | |||
{{Guides}} | |||
[[Category:Guides]] | [[Category:Guides]] | ||
Latest revision as of 15:45, 5 February 2024
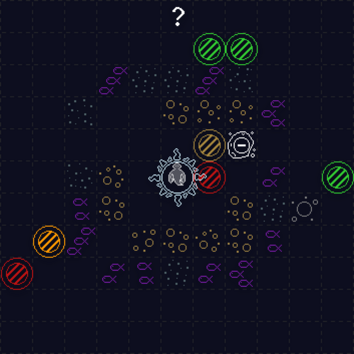
The Overmap is a representation of local space, featuring ships, hazards, and points of interest. This page aims to provide a quick reference to navigating, as well as any hazards and their effects so you can avoid or prepare for them.
Objects
Piloting
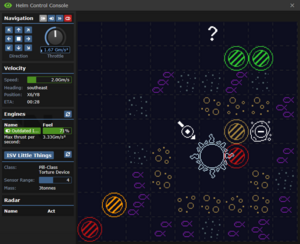
This guide will break down the parts of the helm console display by section, and provide a step-by-step guide at the very end on how to fly like a pro.
Panel Info
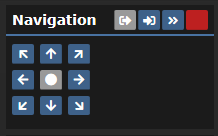
The bread and butter of flying, this panel accepts commands on which direction to burn the engines in. Pressing the middle circular button will cause the engines to fire in reverse, slowing and/or stopping the vessel.
When inputting commands, remember that your control direction is more nuanced than your travel direction. What that means is that you could be traveling 4spM east, and only have to press south once in order to adjust your bearing to southeast, upon which you will travel perfectly diagonally. From there, you only have to press up once to reset your heading to east. Keep this in mind to conserve fuel as you don't need to adjust too much to get the proper heading. Going diagonally means your ship will travel between two cardinal tiles unaffected! Use this to slip between asteroid fields and other hazards without making a major course change.
The four buttons on the top right (from left to right) are the undock button, the dock in space button, the bluespace jump button, and the AI control button. Docking and undocking are covered in the next section. Bluespace jumping removes your ship (along with everything on it, like people and items) from the round, easing the burden on the server. The AI control button is off by default. When it is on, it turns green. Turning it on lets AIs control the ship.
Docking
Assuming you read the last section, you know where the undocking and docking in space buttons are. The undocking button's purpose is simple; it undocks you from wherever you are and lets you move again. The docking in space button will dock you in empty space. To dock to points of interest, see the radar.
Velocity
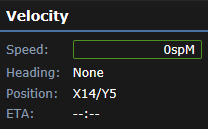
This panel shows the speed, heading(direction), position, and ETA to the next tile of the craft. Remember! You only travel in the direction your heading is the moment the ETA timer runs out. If you're moving fast and make a sudden turn at the last second, you'll travel in the direction you turned, rather than the direction you faced during most of your ETA.
Engines
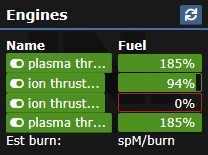
This panel shows the name and fuel level of all the detected engines on the ship. Keep in mind that there is no optimal efficient speed: Your fuel efficiency will be the same no matter what. However, lower speeds are much more forgiving for adjustments fuel-wise. Additionally, You can click the engine’s names to toggle them to strategically save fuel. Your ship will not slow down from drag in empty space, so a high speed can be maintained with little fuel if you're smart about how you use it. If your thrusters are out of fuel, you will suffer passive slowdown to increase your chances of survival!
Ship Info
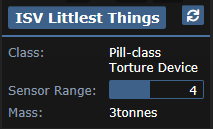
This panel shows the name, class, sensor range, and mass of your vessel. Click the ship name to rename it. See also, Ship Prefixes.
Radar
 This panel shows all of the objects in docking range of your ship. Hit the button in the “Act” column to interact with an object. As of November 2021, you are now able to dock in empty space tiles. Make use of this for spot repairs, ship modification, and other endeavors you need to dock for, but can't find a planet in order to do so.
Piloting Guide
- Ensure your ship is undocked.
- Ensure at least one engine is on and fueled.
- Press the navigational button in the direction you want to fly.
- Press the navigational button again to cease accelerating
- When you get near the destination, press the center button. One press stops any current acceleration, two presses starts braking.
- If you want to dock with the object, go down to the radar tab and hit the “act” button next to the desired docking object.
- You have reached your destination, and are ready to fly anywhere in the solar system!
Advanced Piloting
You've learned the basics. Now it's time for a few tricks to help you stay ahead of the competition.
Advanced Overmap Techniques
The overmap isn't always all it seems. Here's how you can make the best of its little discrepancies (and hidden features!)
- If a ship is hiding itself somehow, as interceptors or pirates are known to, you can locate it easily by right-clicking the tiles on the overmap and looking at the object list. Even if there's no ship sprite on the tile, it's name will pop up in the list. Take that, sneaky bastards!
- The edge of the overmap loops back around in both X and Y. Use it to travel faster, escape from enemy sensors for a moment and hide, or sneak up on someone unsuspecting. Keep in mind it's dangerous to travel quickly across it, as you won't see what's there until you've looped around!
- If you want to be strategic, make an X and Y list of all the planets you come across so you can know where to hide later. It might just come in handy.
Ace Pilot Best Practices
An assortment of other tips that will aid your journey. Did you know... there are three kinds of aces? Those who seek strength. Those who live for pride. And those who can read the tide of battle.
- As long as you're undocked in space, walking into the area outside your ship (hyperspace) will deal incredible brute damage to you, likely killing you. Avoid doing so at any opportunity, or use it to delete items quickly and threaten prisoners.
- Never leave the helm when the ship is in motion, unless you want your ship to explode and your crew to die horribly.
- Setting up your backup generators ahead of time is greatly recommended. Running out of power at the wrong time means you'll likely get shredded by asteroids or worse, especially if you're traveling fast
- Renaming your ship is fun and adds a level of personal touch.
- Never undock without all of your crew accounted for! Due to loading bugs, it can sometimes be impossible to recover crewmates stuck on a planet without admin help. Always issue a warning well before you undock!
- Chasing down other ships is a matter of matching your speed and constantly gauging the area in your scanners. Check the overmap: Where will they run to? Where might they hide? Be a step ahead, always.
- Keep your wideband open, just in case. People tend to use it for emergency distress signals
or idiotic small talk. This is important if you're a rescue ship!
So Your Ship Is Falling Apart...
Uh oh! Did you your pilot fly the ship into an asteroid storm and now you're stuck trying to fix up your ship? Here's what you can do to stay alive!
- Stop the ship. This is your priority. Stopping the ship means you won't fly into more hazards! Ideally, you still have a powered helm and a fueled thruster.
- If you have no power wherever your helm console is, you can move it somewhere else with tools.
- Try to always have some fuel on hand, never spend it all. This helps in emergencies.
- If your helm console or it's circuit are gone, It's pretty much hopeless. Get in a central area and pray for rescue.
- Dock in space and repair your ship as best you can.
- Land at a beach or jungle planet to repressurize your ship. These planets have an Earth-like atmosphere.

